Ok, on my website (I'm using Webflow and their forms), I have a newsletter opt-in. I am using Intercom to manage all of this, so then I need to use Zapier to connect the two.
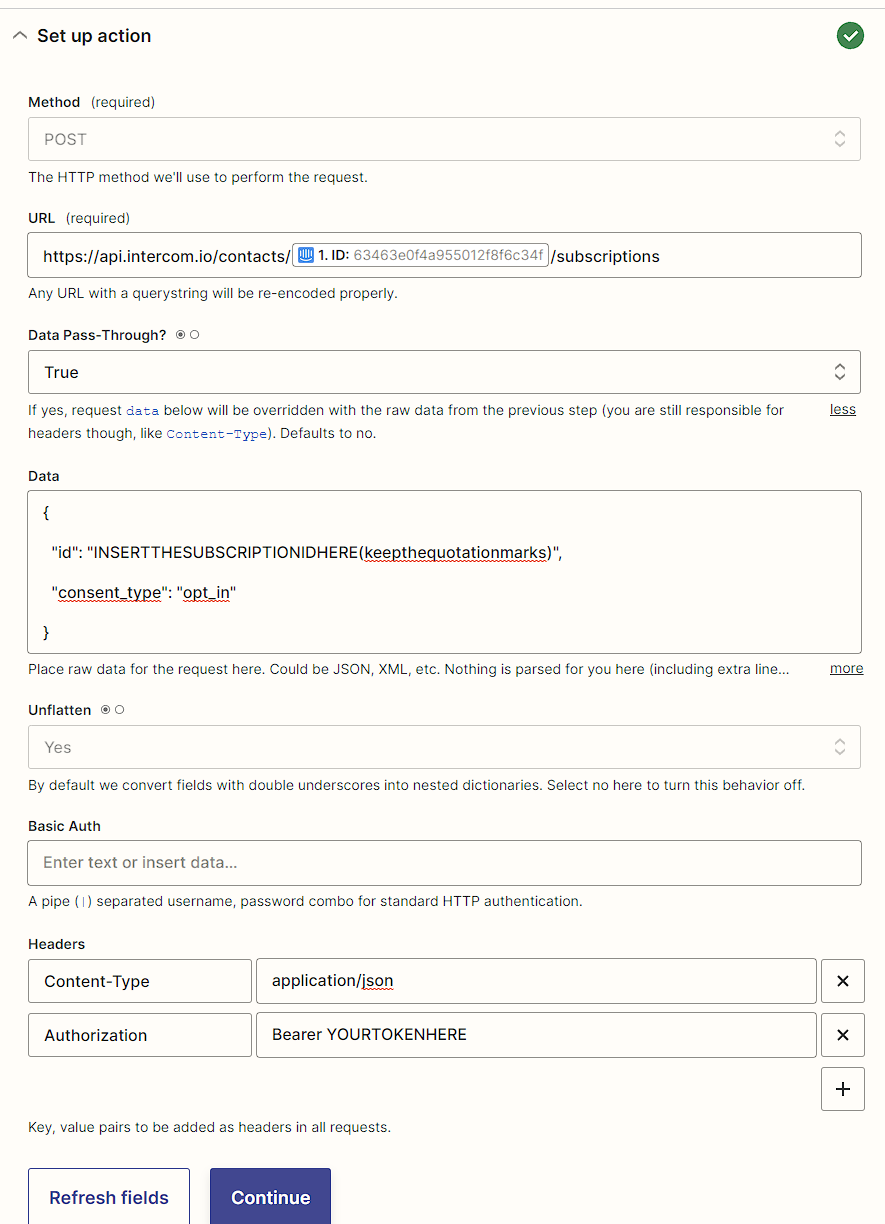
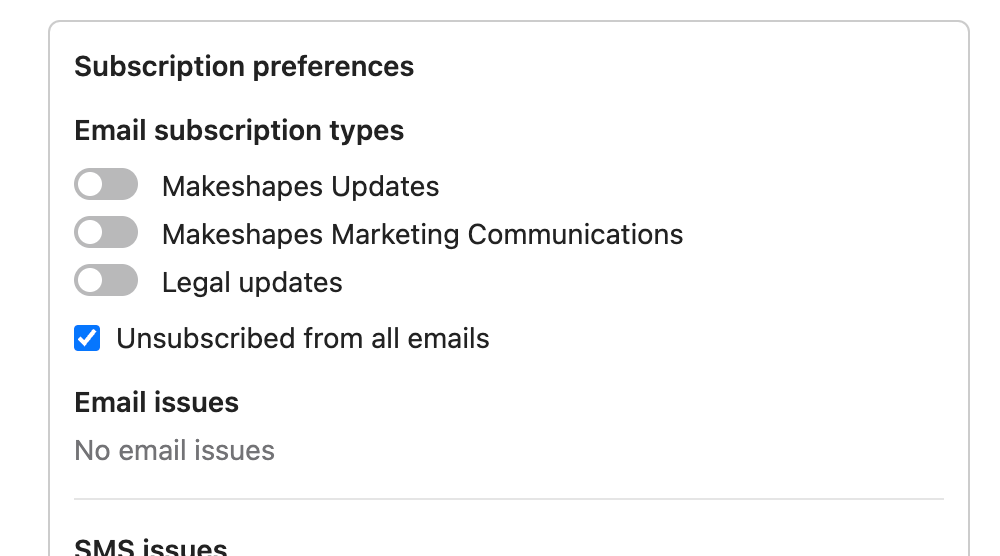
The only option I get in Zapier around email subscription is "Unsubscribed From Emails", which I mark as False. The only thing is, I have an "Opt-in" subscription type, and Intercom doesn't auto-add this type, only the opt-out ones.
Is there any way to Opt-in to these without physically going into each contact and clicking the box?
Best answer by Zak
View original
 However, the
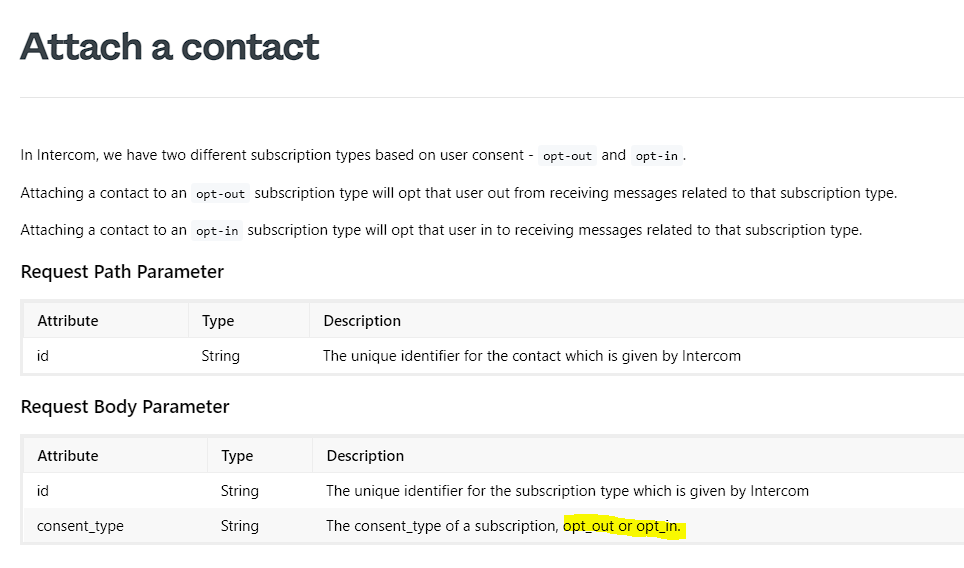
")
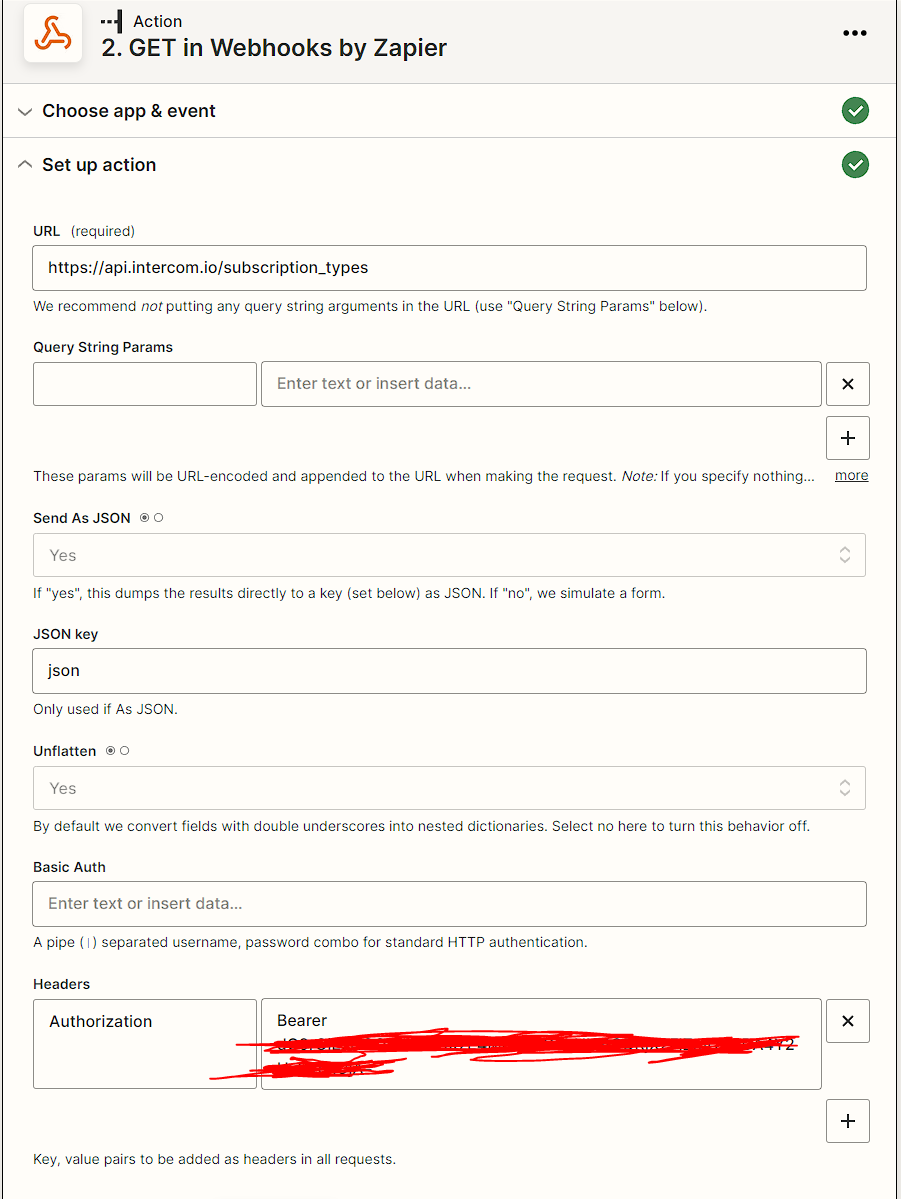
 Step 3. Click on 'Authentication' below 'API Version' and you'll have your token visible. Copy this, you'll need to use it with Zapier. This is the bearer token.